February 16, 2021
Acute Lower Back Pain
Getting Started
The Basics…
…Activities For Acute Low Back Pain
The emphasis of this section is to develop basic movement activities with the goal of stabilizing the low back. The information contained in this section will introduce many concepts geared to improving the quality of life. A savvy person will begin to use these exercises immediately. As with any endeavor in life, the results achieved with the this program will be proportional to the efforts put into it. So let’s get going!
The road to success is marked with many attractive parking places, tempting rest stops, and forbidden U-turns. And watch out for the detours.
A person with a bad low back must keep in mind that with each bout of pain, the chance of it recurring increases. Statistically, after an initial bout of back pain, the back pain sufferer will experience a second occurrence within seven months. This will hold true unless their lifestyle changes.
Some chronic back pain sufferers assume they are getting older and will have to live with their pain. Others try passive therapies (doctor directed) such as medication, analgesic balms, physical therapy, magnetic therapy, or surgery. Chiropractic care falls under this category of passive therapy and has been proven a safe and effective method for the relief of back pain.
According to the United States Agency for Public Health Policy, spinal manipulation (chiropractic adjustments) is one of the safest and most effective methods for the treatment of chronic low back pain.
Another avenue of approach in battling back pain is active care. Unlike passive care in which the doctor is in charge; active care is designed so the pain sufferer can take charge of their recovery through regularly performed stretches and exercise.
The average person with chronic low back pain, in all probability has experienced a decreased quality of life. In general, a person with back pain will learn pain avoidance behaviors which may include non-participation in many family and/or social events. With decreased activity comes an associated loss of strength, endurance, coordination, and balance. Prior to beginning this program, take the time to read and understand all the concepts and activities in this chapter. The goal is to progress to a better back and not regress to a poorer quality of life.
Five Basic Concepts
The following five concepts are the underpinnings of the Acute Back Program. Each one is important for developing a stronger back and when used together as the emphasis of each training session, you will soon be on the road to recovery.
Concept Number One:
Posture Control In All Daily Activities — When working through low back pain one of the goals is to continue a productive life without causing the symptoms to become worse. Performing everyday activities from sitting to lifting can become a challenge. Developing awareness of body positions throughout the day will minimize stress placed upon an unstable back. The activity section of this chapter contains Pelvic Stabilization Exercises. These activities will help in developing awareness between the brain and body which will form the foundation to developing strength, endurance, and coordination of the back without increasing pain.
Concept Number Two:
Breathing — is essential to life. A person can go days to weeks without food, days without water, buy only minutes without air. Many people are shallow breathers and never use the full capacity of their lungs to oxygenate the body. This chapter will incorporate some activities for breathing before, during, and after exercise which will help increase oxygenation of the body washing away fatigue and waste products from the cells. Overall health, in part, depends upon the efficiency of breathing.
Concept Number Three:
Stretching — Inactivity and lifestyle choices can lead to shortened and/or over-stretched muscles, ligaments, and tendons which can effect overall body mechanics. This chapter will incorporate activities geared to make these structures more supple and balanced.
Concept Number Four:
Strength — One of the reasons a person develops back pain is due to a lack of strength. A certain amount of muscular strength is required in overcoming the stresses found with events and activities of everyday life. If the muscles fail to support the body, damage to ligaments and tendons can result. When this occurs a certain amount of instability to the back takes place. The exercises in this chapter will form the foundation of developing muscular strength without increasing back pain.
Concept Number Five
Endurance — Strength is essential in overcoming immediate stresses in life. Sustained challenges require endurance to maintain a healthy back. The nature of the exercises introduced in this section, when performed on a consistent basis will build endurance with subsequent stability of the back.
Stabilization Training For The Low Back
The primary goal of the following exercises are to produce strength and endurance without increasing back pain. Muscle soreness after exercise is sometimes part of the training effect. Increased back and/or leg pain is not. If any of these activities cause your pain to worsen during the exercise, STOP immediately. If the pain persists contact your health care practitioner. If the pain worsens after exercise, you were probably too aggressive and should back off on the intensity of the work-out session next time around.
Activity number one is called VISUALIZATION. The goal of this activity is to initiate body awareness and practice wellness breathing.
To begin the Visualization activity find a firm, level area that will support the weight of your body. A carpeted floor or firm bed will suffice. Lay flat on your back with arms at the sides and legs straight. If this is not comfortable, try propping the knees and/or head up with cushions.
While on your back, close your eyes and keep very still. Slowly breathe in, feeling the lungs fill with air. Pause for a moment, then slowly breathe out. At the end of exhalation pause, then repeat the cycle.
As the slow rhythmic breathing becomes comfortable, begin visualizing the body. Start with the feet. Can you picture them in your mind’s eye? Can you feel where they are in relation to the rest of your body? As you gain awareness of the feet, visualize the ankles, then the shins, knees, thighs, etc. After the body has been visualized piece by piece, assemble the whole with the image of a calm, relaxed person.
Visualization can be performed any time especially when in pain. Practicing this exercise on a consistent basis will enhance the overall awareness of your body.
ABDOMINAL FLEXER
The first skill to master on the road to a healthy back is gaining control of the abdominal (stomach) musculature. Specifically, the rectus abdominis, which is a flat, strap-shaped muscle that keeps the abdominal area flat.
 To begin the Abdominal Flexer exercise lay on a comfortable, supported surface such as a carpeted floor or gym mat. A bed is too soft and will not provide proper support during exercise.
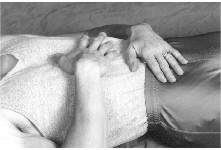
Place the hands on your stomach with one hand on the upper abdominal area and the other on the lower abdominal area. Now raise your head off the ground so that you are looking down toward your feet. You should feel the rectus abdominis (stomach) muscle tighten up. Try this several times, feeling the muscle flex.
Once confident you can flex the stomach muscles while raising your head, try to tighten the rectus abdominis with the head resting on the floor. Learning to control the abdominal musculature is the goal of this exercise. If you cannot feel the muscles flex without raising your head, close your eyes and concentrate on what happens to the body as the head rises off the floor.
 Repeat several times, then test yourself by keeping your head on the floor while flexing the stomach muscles. If you still cannot get the abdominal muscles to flex without raising the head, do not get discouraged, this exercise is harder than it seems. Mastering this activity is very important as it forms the foundation which you will build upon for a healthy back.
FLATTENING THE BACK
The next step on the journey to spinal wellness is an exercise called FLATTENING THE BACK. This exercise builds on the abdominal flexer activity by developing awareness of pelvic movement which will improve coordination and flexibility.
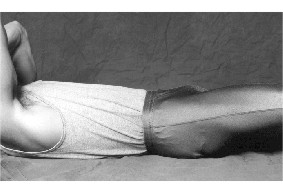
To learn this skill, lie on your back with knees bent so the feet are flat on the floor. Practice a few abdominal flexes in this position. Now that you are warmed up, try rolling your pelvis so the small of your back rests flat against the floor.
Once you can successfully roll the small of the back tightly to the floor, try holding the position for several seconds. For the second part of this activity, lower your legs until they are resting on the ground (knees straight). Now perform the flat back exercise, practicing until you can firmly hold the back to the floor for several seconds. Check to make sure the back is snug against the floor by trying to insert your fingers between the floor and the small of your back. If the fingers can get in, then you are not performing this activity properly. Go back to the bent knee position and practice.
The abdominal flexor and flat back exercises are building blocks of the pelvic stabilization exercises which will form the foundation of the better back program.
Pelvic Stabilization Exercises
These exercises build on the abdominal and pelvic control activities covered in the previous section. To perform these exercises, lay on a firm supportive surface. Practice the abdominal flexion and flat back activities. While laying on your back in the flexed knee position flatten your back and flex your abdominal muscles at the same time. If you have trouble doing this, try raising your head. This will help the abdominal muscles to contract.
Breathing — When performing any exercise, be sure not to hold your breath. Each exercise will require a different rate at which you inhale and exhale. In general, breathe in as you prepare for movement and breathe out as you move.
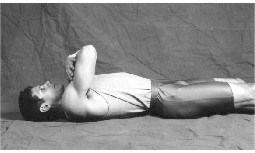
THE BASIC POSITION
When the back is flat against the floor and the abdominal musculature is flexed, this is called the basic position. The basic position is what will build low back strength and endurance. Practice holding the basic position for a few seconds at a time. The goal is to build endurance until you can hold the position for a minute or two. Once this is achieved it is time to move on to the mastery of the next exercise.
The next series of exercises will help to imprint the basic position into the subconscious. One of the goals of the Acute Back Program is to be so thoroughly conditioned by performing the pelvic stabilization exercises in a variety of ways that the back becomes solid as a “brick wall”.
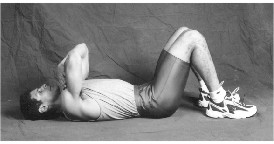
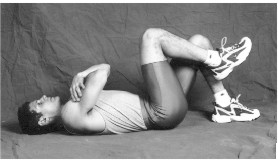 BENT KNEE LEG RAISES
Once the basic position can be sustained for periods longer than two minutes performing the Bent Knee Leg Raises are the first step in challenging these newly developed skills.
To begin, assume the basic position (flat back and flexed abdominal musculature). Slowly raise the right leg (bent knee) at the hip until the thigh is approximately 90 degrees from the floor. Lower the leg slowly back to the foot flat on the floor starting position. Repeat with the opposite leg.
This exercise of alternating leg lifts in a bent knee position should be repeated until the basic position (back flat to the floor, stomach muscles contracted) can no longer be sustained. When this occurs simply relax. Stop and rest. Make sure there is not any increase in pain.
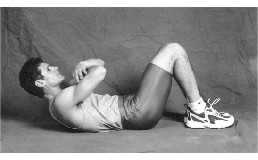
BENT KNEE LEG RAISE WITH EXTENDED ARM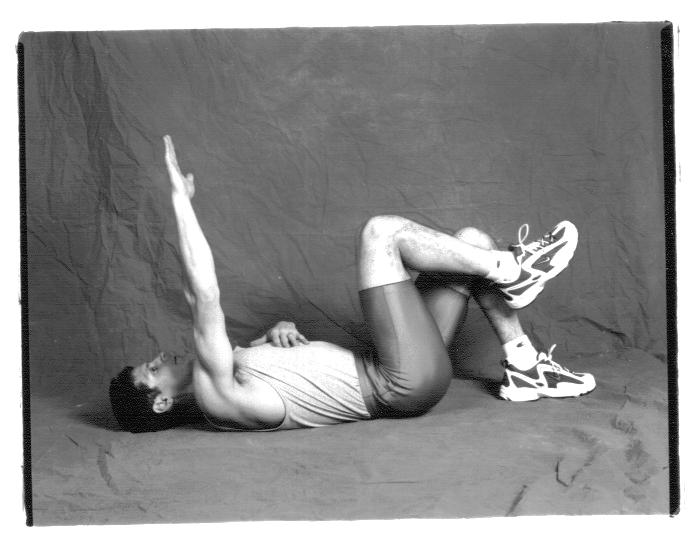 Performing the knee leg raise with the arms extended, working in tandem and in cross-over patterns are advanced steps in the pelvic stabilization exercises. So far, you have learned to perform bent knee leg raises which challenge the flat back/tight abdominal combination (pelvic control). If you have mastered the ability to perform this exercise continuously without losing the tight abs and flat back longer than 5 minutes, it is time to go to the next level.
This time, while performing the bent knee leg raises in the controlled pelvic position, hold both arms (elbows straight) up at 90 degrees (perpendicular) to the floor.
This will challenge pelvic control by adding another level of difficulty. When comfortable holding the arms perpendicular to the floor without losing pelvic control, it is time to advance to the next level. Remember, if your back begins to hurt you must go back to the basics – so take it slow.
The pelvic stabilization exercises which you are mastering have increasing levels of difficulty. Advancement to the next level should be attempted as you gain proficiency with each activity.
Following is a sequence of pelvic stabilization activities. These exercises are listed from easiest to hardest. Please do not advance to the next activity or skip levels until you have built endurance and mastered your current level.
PELVIC STABILIZATION EXERCISES – THE LIST
Abdominal Flexion
Flat Back
Bent Knee Leg Raise
Bent Knee Leg Raise with Arms Extended
Bent Knee Leg Raise — Extended Arms in Tandem
Bent Knee Leg Raise — Arm and Leg Cross-Over
The next level of exercise incorporates the use of the arms and legs as a challenge against the stabile pelvic position (basic position). With the arms and legs in movement you will look like an upside-down turtle trying to get upright.
BENT KNEE LEG RAISE WITH EXTENDED ARMS MOVING IN TANDEM
With this exercise, perform the bent knee leg raise with the arms extended. Move the arms in tandem with the legs. For example, raise the right leg and bring the right arm up, over the head while keeping the left leg and arm stationary. Then raise the left leg and bring the left arm up, over the head while keeping the right leg and arm stationary. Remember to keep your back flat on the floor and stomach tight during this activity. When you canot keep flat and tight it is time to rest.
BENT KNEE LEG RAISE WITH ARM AND LEG CROSSOVER
The next level of difficulty requires a cross-over movement. While maintaining the stable pelvis position, raise your right leg in the bent knee position while moving the left arm towards the head. Return to starting position and repeat on the opposite sides.
With this exercise, perform the bent knee leg raise with the arms extended. Move the arms in opposition to the legs. For example, raise the right leg and bring the left arm up, over the head while keeping the left leg and right arm stationary. Then raise the left leg and bring the right arm up, over the head while keeping the right leg and left arm stationary. Remember to keep your back flat on the floor and stomach tight during this activity. When you canot keep flat and tight it is time to rest.
HIP ROTATORS
.jpg) The goal of this exercise is to increase strength, coordination, and movement to the lower back and hip region through rotation of the leg from the hip, while maintaining a stabile pelvis.
The goal of this exercise is to increase strength, coordination, and movement to the lower back and hip region through rotation of the leg from the hip, while maintaining a stabile pelvis.
To perform this activity, maintain the stabile pelvic position (tight abdominals and flat back) with straight legs. To start, place the right hand on the right hip joint, softly point the right foot, then slowly turn-out your right leg from the hip joint.
As your leg rotates outward you should feel the joint moving under your hand. Be sure the movement comes from the hip and is not a forced knee or foot movement. You could end up with a secondary injury.
The movement of the hip should not be forced and kept within a pain-free range. Slowly roll the leg back to neutral and repeat on the left. Repeat with each leg five times.
Advanced Exercises & Activities
The following activities are more advanced and should not be undertaken if you are experiencing significant back pain and/or have not mastered the pelvic stabilization exercises.
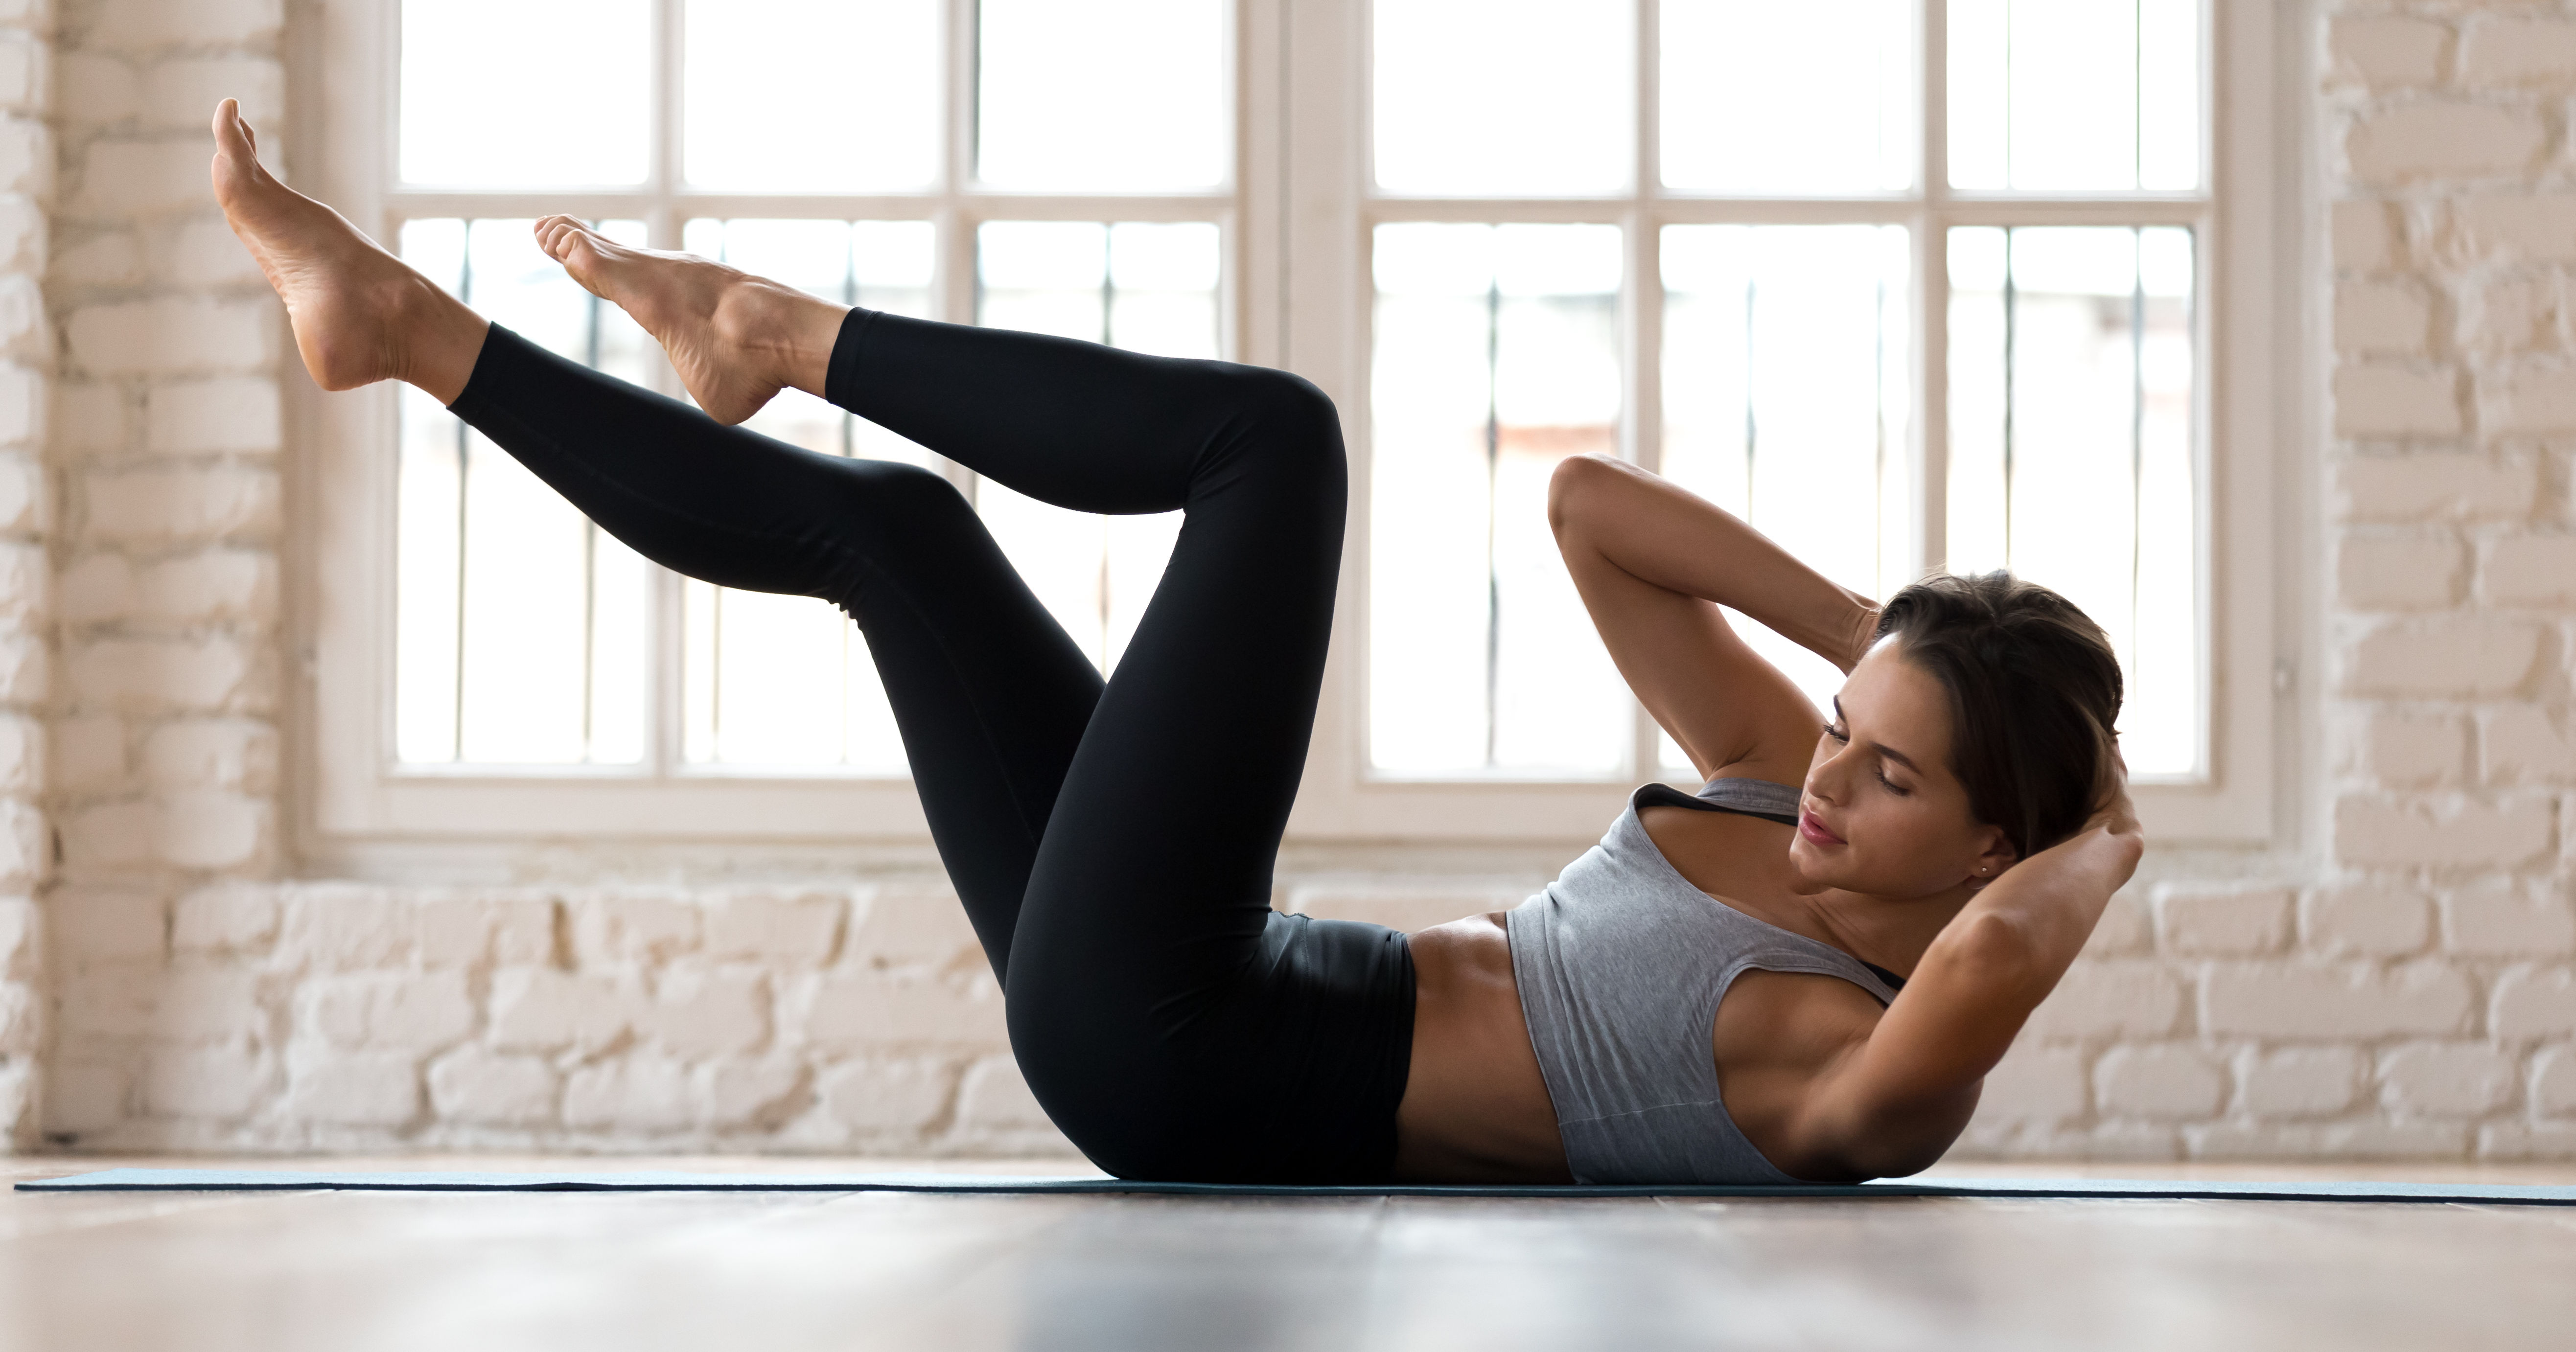
CRUNCHES
Crunches strengthen the stomach (rectus abdominis) muscles which aid in stabilizing the lower back and pelvis. In life, people move around, encountering many obstacles which can irritate an unstable back. By performing this exercise in conjunction with the others presented above on a regular basis, life’s daily stresses will be less challenging.
Keep in mind, if you try to progress faster than the body is healing, you will end up flaring-up your condition, resulting in more pain. If you do get pain during an activity, stop. If you are sore after exercise, next time perform fewer repetitions or go back to the basics until the flare-up calms down.
To perform Crunches, lie on your back in the bent knee position. Support the neck by placing your hands behind it or on the back of the head. Be sure not to pull on the head or neck during the activity. Next roll the pelvis so the back is flat to the floor and the stomach muscles are tight. Gently press your knees together so the inner thigh muscles are slightly contracted (tight). Be sure to hold the stable pelvis and tight knee position throughout the exercise.
Breathe in to prepare for movement and breathe out as you slowly roll the shoulders off the ground. When the shoulder blades are off the ground, hold for a moment and slowly lower back down breathing in as you go down. Start with five repetitions with a goal of reaching 20 per set over time.
Persistence is the hammer that drives the nail of success.
HIP AND THIGH STRETCH
The Hip and thigh stretch is designed to increase flexibility of the lower back, hips, and thigh musculature. As you progress through the basic exercises, this activity can be a great warm up to the intermediate and advanced workouts.
Lie on your back quietly resting. Grasp one of you thighs with both hands and gently pull the leg towards the chest. This should be a pain-free stretch. If you experience any pain, back off on the pressure.
The Hip and Thigh stretch helps increase flexibility of the hip and leg muscles. Hold the stretch for 3 to 5 breaths. Repeat with the other leg. Each leg should be stretched three times.
Next grasp the right thigh with the right hand and the left thigh with the left hand. Gently pull both thighs toward the chest, hold for 3 to 5 breathes, then slowly lower back to the resting position. Repeat 3 times.
THE CAT STRETCH
The Cat Stretch is a great warm-up and is helpful in learning to use the abdominal and hip muscles when performing the pelvic tilting component of the stable pelvis activities.
To start-kneel on all fours with the hands placed slightly wider than the shoulders. If you have wrist problems, rest on your knuckles. If not, the fingers should be pointing straight ahead. The knees should be spaced about as wide as the hips and the toes should be pointing backwards. The back should be flat, like a table.
Part One — roll the pelvis up and back like a Halloween Cat. Contract your abdominal muscles, breathe out, and bring the head to your chest as you complete the initial part.
For the second part of the Cat Stretch, return to the starting position. This time, roll the pelvis down and forward, so the mid-section hangs like an old horse, raising the head so you are looking forward. Breathe out as you move. Repeat this five times.
Following is a chart which demonstrates the progression of the stabilization exercises. Do not move on to the next level of activities until you feel comfortable with the one you are currently working on.
| EXERCISE / ACTIVITY | REPETITIONS OR DURATION |
| Abdominal Flexion | Practice until proficient |
| Flat Back | Practice until proficient |
| Bent Knee Raises | Hundreds of repetitions |
| Bent Knee Raises (With arms raised) | Perform repetitions until you cannot hold proper form. |
| Bent Knee Raises (arms & legs in tandem) | Perform repetitions until you cannot hold proper form. |
| Bent Knee Raises (Arm & leg cross-over) | Perform repetitions until you cannot hold proper form. |
| Hip Rotators | 5 times each leg |
| Crunches | 5 to 20 repetitions |
| Hip and Leg Stretch | Hold 3 to 5 breathes X 3 |
| Cat Stretch | Repeat five times |
Post on February 13, 2021

Latest Posts
Keeping The Back Healthy Exercises

Why Exercise
February 15, 2021
Shoulder Exercises
February 15, 2021